Understanding Basement Flooring Challenges
When it comes to DIY basement flooring installation, the first thing you need to understand is that basements are very different from the rest of your home. They come with their own set of challenges—mainly moisture and temperature fluctuations. These factors can significantly impact what type of flooring will work best and last the longest.
Why Moisture Matters
Basements are below ground level, which means they are more prone to moisture problems. Water can seep in through the foundation walls or floor, especially during heavy rain or when the water table rises. Even if your basement doesn’t flood, high humidity levels can still cause issues like mold, mildew, and warping in certain types of flooring.
Temperature Fluctuations
Unlike the main floors of your home, basements often lack proper insulation and climate control. This leads to bigger temperature swings, especially in areas with cold winters and hot summers. Some flooring materials expand and contract with temperature changes, which could lead to cracking or buckling over time.
Common Basement Conditions vs Flooring Compatibility
| Basement Condition | Impact on Flooring | Best Flooring Types |
|---|---|---|
| High Humidity | Mold growth, material damage | Vinyl Planks, Ceramic Tile, Sealed Concrete |
| Water Seepage | Warping, swelling of materials | Waterproof Laminate, Rubber Flooring |
| Cold Floors | Uncomfortable to walk on | Cork Flooring, Carpet Tiles with padding |
| Poor Ventilation | Mildew smell and air quality issues | Mold-resistant flooring options only |
The Importance of Choosing the Right Material
Selecting a floor that can handle these conditions isn’t just about durability—it’s also about safety and comfort. For example, choosing a non-waterproof laminate might save you money upfront but could cost more down the road if it gets damaged and needs replacing. On the other hand, investing in waterproof or moisture-resistant materials can give you peace of mind and a longer-lasting result.
A Quick Tip:
If youre unsure whether your basement has moisture issues, try taping a piece of plastic wrap to the concrete floor for 24 hours. If condensation forms underneath it, you’ve got moisture—and you’ll want to select your flooring accordingly.
The key takeaway here is that not all floors are created equal when it comes to basements. Understanding these common challenges will help you make smart choices as you plan your DIY basement flooring project.
2. Best DIY-Friendly Flooring Options for Basements
When it comes to finishing your basement, choosing the right flooring is key—especially if you’re planning to do it yourself. Basements can be tricky due to moisture and temperature changes, so its important to pick materials that are not only durable but also easy for homeowners to install on their own. Below is a breakdown of some of the best DIY-friendly flooring options for basements, including pros, cons, and why they work well in below-grade spaces.
Top Basement Flooring Materials for DIY Installation
| Flooring Type | DIY Difficulty | Water Resistance | Comfort | Ideal For |
|---|---|---|---|---|
| Vinyl Planks | Easy | High | Moderate | Most basements, especially moisture-prone areas |
| Engineered Wood | Moderate | Medium | High | Semi-finished basements with low humidity |
| Laminate Flooring | Easy | Moderate (with vapor barrier) | Moderate | Drier basements or elevated subfloors |
| Carpet Tiles | Very Easy | Mild (some are mold/mildew resistant) | High | Kid playrooms, home gyms, media rooms |
| Epoxy Coatings | Difficult | Excellent | Poor (hard surface) | Laundry rooms, utility areas, modern industrial look |
Vinyl Planks (LVP/LVT)
This is one of the most popular choices for basement flooring because it’s waterproof, affordable, and looks great. Luxury Vinyl Plank (LVP) or Luxury Vinyl Tile (LVT) often comes with click-and-lock systems that make installation simple—even for beginners.
Main Benefits:
- Mimics wood or stone appearance without the cost or maintenance.
- Tolerates high humidity and occasional water leaks.
- No glue required for floating floors; just snap into place.
Engineered Wood Flooring
If you love the look of hardwood but want something more basement-appropriate, engineered wood is a great compromise. It features a real wood veneer over plywood layers that resist warping better than solid hardwood.
Main Benefits:
- Adds warmth and value to your space.
- Easier to install than solid hardwood (especially click-lock styles).
- Suits lower levels with controlled moisture levels.
Laminate Flooring
Laminates offer the look of wood at a fraction of the cost. Many modern options are water-resistant and come with simple locking mechanisms that make them suitable for DIY installs in drier basement areas.
Main Benefits:
- A budget-friendly option with many style choices.
- Adds a bit of cushioning underfoot when paired with an underlayment.
- Easier to replace individual planks if damaged.
Carpet Tiles
If youre looking for comfort and warmth underfoot, carpet tiles are a smart solution. They’re easy to install by peeling and sticking or using adhesive dots—and even easier to replace if one gets stained or damaged.
Main Benefits:
- Adds insulation and soundproofing to your basement.
- Makes cold floors feel cozy—perfect for family spaces or kids’ rooms.
- You can mix and match colors or patterns for custom designs.
Epoxy Floor Coating
This isn’t technically a “flooring” material like others on this list, but epoxy coatings turn concrete slabs into sleek, waterproof surfaces. It’s more labor-intensive but offers excellent durability in utility-focused spaces.
Main Benefits:
- Chemical-resistant and super easy to clean.
- No seams—great for resisting water and spills.
- You can add color chips or patterns for a polished finish.
Selecting the right flooring depends on how you use your basement and how much time you want to spend on installation. Luckily, all of these options are designed with DIYers in mind—giving you plenty of flexibility without sacrificing style or performance.

3. Tools and Materials You’ll Need
Before you jump into your basement flooring project, it’s important to gather all the necessary tools and materials. Having everything ready beforehand will help ensure a smoother DIY process and reduce unnecessary trips to the hardware store. Heres a breakdown of what you’ll need, depending on the type of flooring youre installing—whether its vinyl planks, laminate, carpet tiles, or engineered wood.
Essential Tools
| Tool | Purpose |
|---|---|
| Tape Measure | To measure floor dimensions accurately |
| Utility Knife | For cutting vinyl or carpet tiles |
| Rubber Mallet | To tap flooring pieces into place without damaging them |
| Flooring Spacers | Maintain expansion gaps along walls for floating floors |
| Level | Ensure subfloor is even before installation begins |
| Tapping Block & Pull Bar | Help lock flooring planks together tightly |
| Jigsaw or Circular Saw | For cutting around corners, vents, or door frames (mainly for laminate or wood) |
| Knee Pads | Protect your knees during installation work |
| Pry Bar (optional) | If removing old flooring beforehand |
| Broom or Shop Vac | Clean subfloor before laying new material down |
Common Materials Needed by Flooring Type
Vinyl Plank Flooring:
- Luxury Vinyl Planks (LVP)
- Underlayment (if not pre-attached)
- Adhesive (for glue-down types)
Laminate Flooring:
- Laminated Planks with click-lock edges
- Moisture barrier or underlayment pad (especially important in basements)
Carpet Tiles:
- Peel-and-stick or glue-down carpet tiles
- Floor tile adhesive (if required)
Engineered Wood:
- Engineered hardwood planks suitable for below-grade installations
- Moisture-resistant underlayment or vapor barrier film/li>
- Nail gun or flooring stapler (for nail-down options)
Optional Extras for Better Results:
- Dehumidifier – Helps control moisture levels in the basement pre- and post-installation.
- Mold-resistant primer – Ideal if youre sealing a concrete subfloor before installing.
Having the right tools and materials on hand can make your DIY basement flooring project more manageable and enjoyable. Once you’ve gathered everything you need, you’ll be ready to move on to preparing your space for installation.
4. Step-by-Step Guide to Installing Basement Flooring
If you’re ready to upgrade your basement with new flooring, doing it yourself can save a lot of money and give you total control over the look and feel of the space. Follow these simple steps to prepare your basement, install a moisture barrier, lay your flooring, and finish like a pro.
Step 1: Prepare the Basement Floor
Clean and Inspect
- Remove any old flooring materials.
- Sweep and vacuum thoroughly to remove dust and debris.
- Check for cracks or uneven areas in the concrete slab. Fill small cracks with concrete patch filler.
Level the Surface
- Use a long level to check for dips or high spots.
- If needed, apply self-leveling compound to even out the surface.
Step 2: Install a Moisture Barrier
Basements are prone to moisture, so this step is critical to prevent mold, mildew, and damage to your new flooring.
| Type of Moisture Barrier | Description | Best For |
|---|---|---|
| 6-mil Plastic Sheeting | A basic plastic vapor barrier that rolls out over concrete. | Laminate, Vinyl Plank |
| Foam Underlayment with Vapor Barrier | Cushions the floor while blocking moisture. | Floating Floors like Laminate or Engineered Wood |
| DriCore Subfloor Panels | Interlocking panels that elevate flooring off the concrete. | Finished Basements needing warmth and insulation |
Step 3: Lay Down Your Chosen Flooring
Laminate or Vinyl Plank Flooring (Floating Method)
- Start from one corner of the room, placing spacers between the planks and wall for expansion gaps.
- Click planks together row by row using a tapping block and rubber mallet if needed.
- Stagger seams for a natural look—at least 6 inches between end joints in adjacent rows.
Carpet Tiles
- Dry-fit tiles to plan layout before applying adhesive or tape.
- Use double-sided carpet tape or peel-and-stick tiles directly on subfloor or moisture barrier.
- Trim edges with a utility knife for clean wall-to-wall coverage.
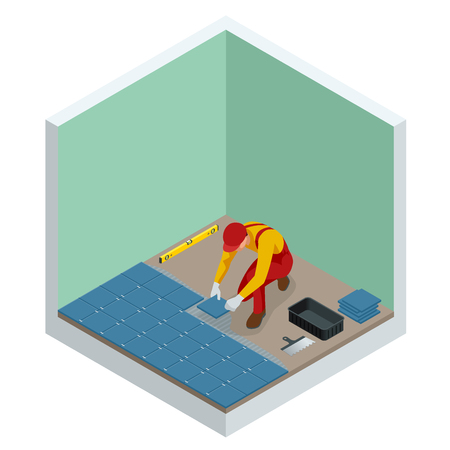
Ceramic Tile (Advanced DIY)
- Apply a waterproof membrane over concrete using thin-set mortar.
- Lay tiles with spacers and thin-set mortar; press firmly into place.
- Let set overnight, then grout lines and wipe off excess with sponge.
Step 4: Finish Like a Pro
Add Baseboards or Quarter Round Molding
- Nail baseboards around the perimeter to hide expansion gaps and give a polished look.
Seal the Edges (if applicable)
- If using vinyl or tile, run a bead of silicone caulk where floor meets walls for extra moisture protection.
Final Cleanup
- Sweep up any dust or debris left from installation.
- Damp mop if flooring type allows—check manufacturer’s instructions first!
Your basement floor is now ready for furniture, décor, or whatever project you have planned next!
5. Maintenance Tips for Long-Lasting Basement Floors
After putting in the time and effort to install your new basement flooring, you’ll want to keep it looking great and lasting as long as possible. Basements are naturally prone to moisture and temperature changes, so regular care is key. Here are some simple tips to help protect your investment and enjoy your upgraded space for years to come.
Keep Moisture in Check
Moisture is one of the biggest threats to basement floors, especially if you’ve installed materials like laminate or engineered wood. Prevent water damage by following these steps:
- Use a dehumidifier: Maintain humidity levels between 30-50% to reduce condensation.
- Check for leaks: Inspect walls and plumbing regularly for signs of water intrusion.
- Add rugs with non-slip backings: These can help absorb minor moisture while adding comfort.
Clean Regularly
A clean floor not only looks better but also lasts longer. Here’s how to clean common basement flooring types:
| Floor Type | Cleaning Tips |
|---|---|
| Vinyl Plank | Sweep or vacuum weekly; mop with a damp mop and mild cleaner monthly. |
| LVP/LVT | Avoid harsh chemicals; use a pH-neutral cleaner for best results. |
| Ceramic Tile | Sweep frequently; mop with warm water and tile-safe cleaner; reseal grout every 1-2 years. |
| Engineered Wood | Use a microfiber mop; avoid standing water; clean spills immediately. |
| Carpet Tiles | Vacuum weekly; spot clean stains with carpet-safe cleaners. |
Protect High-Traffic Areas
If your basement doubles as a game room, gym, or family hangout space, consider these protective measures:
- Add area rugs: Place them in entryways and under furniture to prevent scratches or wear.
- Use furniture pads: Stick felt pads under chair and table legs to avoid damaging the floor surface.
- Rearrange occasionally: Moving furniture slightly can help distribute wear more evenly over time.
Avoid Harsh Chemicals
No matter the type of floor you installed, harsh chemicals can cause discoloration or damage. Stick with gentle, non-abrasive cleaners. Always check product labels before using anything new on your floors.
Make the Most of Your New Space
Your newly finished basement is more than just another room—it’s an extension of your home. Whether you turned it into a home theater, guest suite, or office, keeping the flooring in top shape enhances its function and value. Add storage solutions to keep clutter off the floor and invest in quality lighting to show off your hard work!
With just a little routine care and attention, your DIY basement flooring will stay beautiful and functional for many years ahead.


