1. Planning Your Outdoor Lighting Layout
Before you dive into installing your LED outdoor lighting system, it’s essential to start with a solid plan. Begin by assessing your outdoor space—walk around your yard or garden at dusk and take note of the areas that could benefit from illumination. Identify pathways, patios, entryways, and any standout landscape features like trees or flower beds. Next, determine specific lighting zones based on the different activities you want to accommodate, such as entertaining guests on the patio, highlighting architectural details, or providing security along walkways. Once you’ve mapped out these zones, it’s time to select the best LED fixtures for each area. Consider factors like brightness, color temperature, and fixture style to ensure your choices complement both the function and aesthetic of your home. By taking the time to thoughtfully plan your layout, you’ll set yourself up for a smooth installation process and create an inviting outdoor environment that enhances curb appeal and safety.
2. Gathering Tools and Materials
Before you dive into installing your LED outdoor lighting system, it’s crucial to gather all the necessary tools and materials. Having everything ready from the start will make the process smoother and save you from unnecessary trips to the hardware store. Below is a comprehensive list of the essential tools and hardware commonly used for seamless installation in American homes:
| Tool/Material | Description | Why You Need It |
|---|---|---|
| LED Outdoor Light Fixtures | Your selected lights designed for outdoor use | The core component of your lighting system |
| Transformer (if required) | Steps down household voltage to safe levels for LED fixtures | Ensures proper power supply and safety |
| Low Voltage Wire (typically 12 or 14 gauge) | Outdoor-rated wire for connecting fixtures to transformer | Reliable power transmission between components |
| Wire Connectors (waterproof) | Connects wiring safely, protecting against moisture | Keeps connections secure and weather-resistant |
| Cable Stakes or Conduit | Secures wire along pathways or underground | Prevents tripping hazards and protects wires from damage |
| Drill & Drill Bits | Cordless drill with masonry or wood bits as needed | Makes holes for mounting fixtures or anchors |
| Screwdrivers (Phillips & flathead) | For attaching hardware and making adjustments | Universal tool for assembly tasks |
| Pliers & Wire Strippers/Cutters | Hand tools for preparing wire ends and securing connectors | Ensures clean, safe electrical connections |
| Tape Measure & Marker Flags | Measuring tape and small flags or stakes to mark fixture locations | Keeps your layout organized and accurate during setup |
| Shovel or Garden Trowel | For burying wire along garden beds or walkways if needed | Keeps wiring hidden and protected underground |
| Weatherproof Electrical Tape or Heat Shrink Tubing (optional) | Adds extra protection to wire connections in exposed areas | Enhances longevity of your installation in harsh conditions |
If your project requires smart controls or timers, be sure to add those to your checklist as well. Double-check that all components are rated for outdoor use to withstand rain, snow, and fluctuating temperatures typical across the U.S. Once you’ve gathered these items, you’ll be well-prepared to move on to planning your layout and starting the installation process.

3. Preparing the Site and Safety Checks
Before you start installing your LED outdoor lighting system, it’s crucial to properly prepare the site and perform all necessary safety checks. Begin by clearing the installation area of any debris, rocks, or vegetation that might obstruct your work or interfere with the placement of wiring and fixtures. This ensures a smooth installation process and helps prevent future issues with your lighting system.
Next, check for underground utilities before digging or placing stakes in the ground. In the United States, it’s standard practice to call 811 or use your state’s “Call Before You Dig” service to identify any buried power lines, gas pipes, or water mains. Skipping this step can be dangerous and may result in costly repairs or service interruptions.
Finally, always follow local safety codes and best practices. Each city or county may have specific regulations regarding outdoor electrical work and lighting installations. Make sure to obtain any required permits, use weatherproof materials rated for outdoor use, and adhere to guidelines set by organizations like the National Electrical Code (NEC). By taking these precautions, you’ll create a safe environment for both yourself and anyone who enjoys your newly illuminated space.
4. Installing the Wiring and Transformer
Once your lighting layout is mapped out, the next step is to properly install the low-voltage wiring and connect the transformer. Careful planning and execution are crucial for both safety and optimal performance of your LED outdoor lighting system. Use the following steps as a guideline to ensure your installation aligns with your design plan and meets American electrical standards.
Laying Out Low-Voltage Wiring
Begin by running low-voltage wires along the planned path, keeping them hidden as much as possible. Bury the wires at least 6 inches below ground level in landscape beds or tuck them under mulch or gravel for added protection. Make sure to keep wires clear of high-traffic areas or where future digging might occur. Use waterproof wire connectors for all splices, and avoid sharp bends that could damage the insulation.
Connecting the Transformer
The transformer is the heart of your LED outdoor lighting system, converting your household’s 120V power supply down to a safe 12V for landscape lights. Mount the transformer on an exterior wall near a GFCI outlet, ideally close to where most of your lights are located to minimize voltage drop. Follow the manufacturer’s instructions for connecting main wires to the transformer terminals, making sure connections are secure and polarity is correct.
Ensuring Proper Power Supply
Before turning on your system, double-check that all wiring matches your lighting plan and that no exposed copper is visible at connection points. Here’s a quick reference table for common American wire gauges and their recommended maximum run lengths for low-voltage lighting:
| Wire Gauge (AWG) | Maximum Run Length (Feet) – 100W Load |
|---|---|
| 12 AWG | 100 ft |
| 14 AWG | 50 ft |
| 16 AWG | 30 ft |
Final Checks Before Powering Up
Once everything is connected, plug in the transformer and test each zone or circuit individually before fully securing wires or backfilling trenches. This will help you quickly identify any issues without needing to redo significant work. Remember: always follow local electrical codes and consult a licensed electrician if you’re unsure about any step in this process.
5. Mounting and Connecting the LED Fixtures
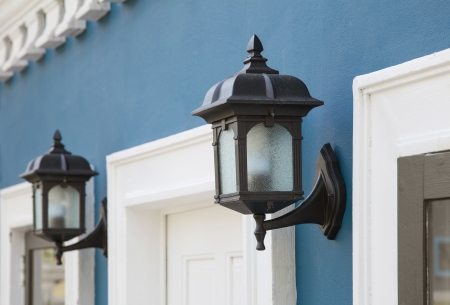
Once your wiring is in place, it’s time to mount and connect your LED fixtures. First, securely install each fixture according to the manufacturer’s instructions. For ground-mounted lights, use stakes or mounting brackets, ensuring each fixture is firmly anchored to withstand wind and weather. If you’re installing wall or eave fixtures, double-check that all screws are tightened and the fixtures are flush against the surface for maximum stability.
Next, focus on making waterproof connections. Outdoor lighting systems are exposed to rain, sprinklers, and humidity, so protecting your electrical connections is crucial. Use waterproof wire nuts or gel-filled connectors designed for outdoor use. After connecting the wires, wrap them with electrical tape and place them inside a weatherproof junction box if possible. This will help prevent short circuits and extend the lifespan of your system.
Finally, position your lights for optimal effect and coverage. Aim path lights to evenly illuminate walkways without creating glare. Accent lights should highlight landscaping features, trees, or architectural details. Take a step back during installation—view your layout from multiple angles at night if possible—and make adjustments to avoid dark spots or overly bright areas. Thoughtful placement not only enhances curb appeal but also improves safety around your property.
6. Testing and Adjusting the System
Now that your LED outdoor lighting system is fully installed, it’s time to power up and make sure everything works as intended. Begin by switching on the main power supply to your lighting system. Carefully walk around your property and check each individual light fixture for proper functionality. If any lights fail to illuminate, double-check their connections or refer to the manufacturer’s troubleshooting guide. Once you’ve confirmed all lights are working, it’s time to fine-tune their orientations. Use this opportunity to adjust the angle and direction of each fixture to highlight landscape features, pathways, or architectural elements. Take note of the overall ambiance—are some areas too bright or too dim? You can tweak beam angles or reposition fixtures until you achieve a balanced and inviting nighttime atmosphere. Remember, LED outdoor lights often come with adjustable brightness or color temperature settings; experiment with these options for added customization. Finally, step back and view your property from multiple vantage points to ensure a cohesive look that enhances curb appeal and safety. Testing and adjusting are essential final steps that turn your installation into a truly tailored lighting solution.


