Understanding Roof Safety Basics
Before you even think about climbing onto your roof, it’s crucial to understand the basic safety precautions that every homeowner should follow. Roof work, even simple inspections, can be risky if you don’t take the right steps. First, always check the weather forecast and avoid working on wet, icy, or windy days. Slippery conditions are a top cause of accidents. Next, make sure you wear proper attire—rubber-soled shoes for traction, comfortable but snug-fitting clothes that won’t snag, and gloves for grip and protection. Never go up in sandals or flip-flops. It’s also smart to use a sturdy ladder with non-slip feet and have someone spot you from the ground whenever possible. Bring along essential equipment such as a safety harness (especially for steep roofs), a helmet to protect your head, and a tool belt to keep your hands free while moving. By preparing with the right gear and respecting safety basics, you’ll minimize risks and set yourself up for a successful DIY roof inspection.
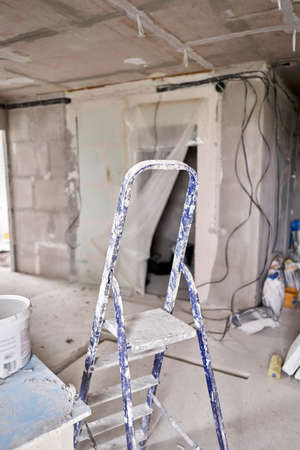
Gathering the Right Tools and Materials
Before you climb up to your roof, it’s important to gather all the essential tools and materials for a safe and effective inspection. You don’t need to break the bank—many of these items are affordable and can be found at your local hardware store or online. Here’s a practical breakdown of what you’ll need:
Basic Safety Gear
Safety is always the top priority. Even if your roof isn’t steep, accidents can happen fast. Always invest in the following:
| Item | Estimated Cost | Purpose |
|---|---|---|
| Non-slip shoes or boots | $30-$60 | Improves traction and reduces slip risk |
| Work gloves | $10-$20 | Protects hands from rough surfaces or sharp edges |
| Sturdy ladder (with stabilizer) | $80-$150 (buy) / $20+ (rent) | Safe access to the roof |
| Safety harness (optional but recommended for higher roofs) | $40-$100 | Adds extra safety during inspection |
Inspection Tools
You’ll want to take a close look at shingles, gutters, flashing, and more. These handy tools make inspection easier:
| Item | Estimated Cost | Purpose |
|---|---|---|
| Flashlight or headlamp | $10-$25 | Spotting dark or shaded damage areas, especially under eaves |
| Tape measure | $5-$15 | Measuring damaged sections for repair estimates |
| Binoculars (for ground-level checks) | $15-$40 | Inspecting hard-to-reach spots without climbing up every time |
Cleaning Supplies & Minor Repair Materials
If you spot debris or minor issues, having some basic supplies on hand lets you handle them on the spot:
| Item | Estimated Cost | Purpose |
|---|---|---|
| Broom or leaf blower | $10-$30 / $40-$100 (blower) | Removing leaves, twigs, and loose debris from the roof surface and gutters |
| Pry bar or flat-head screwdriver | $8-$20 | Lifting shingles gently for closer inspection underneath |
A Few Tips Before You Start:
- Check weather conditions—never inspect during rain or strong winds.
- If possible, have someone with you for added safety.
- Create a checklist of trouble spots (like cracked shingles or clogged gutters) so you don’t overlook anything during your inspection.
This upfront investment in basic tools is both budget-friendly and wise, giving you confidence as you tackle your DIY roof inspection safely and thoroughly.

3. Conducting a Ground-Level Inspection
If you want to keep your roof in good shape without climbing up a ladder, start by doing a ground-level inspection. This simple step lets you spot obvious issues while staying safe in your yard. Walk around your house and look up at the roof from different angles. Pay close attention to missing or damaged shingles—these often show up as dark patches or uneven lines. Also, check for sagging areas, which can be an early sign of structural trouble.
Next, take a look at your gutters and downspouts. If you notice leaves or debris sticking out, there’s a good chance your gutters are clogged. Clogged gutters can lead to water pooling on your roof or overflowing near your foundation, causing bigger problems down the line. You might also see streaks of dirt or mildew running down your siding; this is another hint that water isn’t draining properly.
Don’t forget to examine any flashing around chimneys, vents, or skylights from where you stand. Flashing should appear flat and intact; if it looks bent or is pulling away from the roof, it could let water seep in during storms. If you have binoculars, use them for a closer look without needing to get on a ladder.
By making ground-level inspections part of your seasonal home checklist—especially after heavy storms or high winds—you can catch small issues before they become expensive repairs. It’s an easy habit that helps protect your home and keeps you safely on solid ground.
4. Climbing Up: Inspecting Roof Shingles, Flashing, and Gutters
Before you even think about climbing up on your roof, safety should be your top priority. Many homeowners get injured each year due to falls or improper ladder use. Here’s how you can access your roof and carry out an effective inspection while minimizing risks.
Step-by-Step Tips for Safely Accessing Your Roof
- Choose the Right Ladder: Use a sturdy extension ladder rated for your weight. The ladder should extend at least three feet above the edge of the roof.
- Pick a Dry, Calm Day: Wet or windy conditions significantly increase the risk of slipping or losing balance.
- Use Proper Footwear: Wear shoes with rubber soles that provide good traction to prevent slipping.
- Secure the Ladder: Place it on level ground and have someone hold it steady as you climb.
- Bring Only Essential Tools: Carry tools in a tool belt to keep your hands free for climbing.
What to Check: Shingles, Flashing, and Gutters
| Component | What to Look For | Common Issues |
|---|---|---|
| Shingles | Cracks, curling, missing granules, loose or missing shingles | Leaks, water damage, insulation issues |
| Flashing | Dents, rust, loose sections, gaps around chimneys/vents | Water intrusion, mold growth, structural damage |
| Gutters | Clogs from leaves/debris, sagging sections, leaks at seams | Poor drainage, foundation damage, wood rot |
How to Avoid Common Hazards While Inspecting
- Avoid Walking on Steep Slopes: If your roof is steeply pitched or especially high, consider using binoculars from the ground or hire a professional for detailed inspection.
- Watch for Weak Spots: Be cautious of soft areas which could indicate rotting wood beneath—step only on dry, solid surfaces.
- Avoid Electrical Hazards: Stay clear of overhead power lines and avoid working near them with metal ladders or tools.
- Don’t Overreach: Move your ladder as needed rather than stretching too far to reach a spot; overreaching is a leading cause of falls.
- Have a Spotter: Whenever possible, ask someone to stay nearby while you’re inspecting your roof in case of emergency.
If You Discover Serious Damage…
If you encounter significant shingle loss, large areas of flashing damage, or gutters pulling away from the house structure, it’s best to consult a roofing professional. Some repairs are too risky or complex for DIY solutions and could void warranties if not handled properly.
5. Performing Basic Maintenance Tasks
Maintaining your roof doesn’t have to be expensive or complicated. By handling a few simple tasks regularly, you can help extend your roof’s lifespan and prevent costly repairs down the road. Start by clearing away debris such as leaves, branches, and dirt. These can trap moisture and cause rot or moss growth, so make it a habit to sweep or gently hose off your roof at least twice a year—especially after storms or in the fall.
Sealing Minor Leaks
If you spot small leaks during your inspection—like water stains in the attic or damp spots on the ceiling—you can often handle these without calling in a pro. Use a high-quality roofing sealant to patch up minor cracks or gaps around flashing, vents, and chimneys. Make sure the area is dry before applying sealant for best results.
Replacing Damaged Shingles
Damaged or missing shingles are one of the most common issues homeowners face. If you find any that are cracked, curled, or loose, replace them promptly to keep water from seeping underneath. Most hardware stores sell bundles of shingles, and you’ll just need a pry bar and hammer to do the job. Always match new shingles to your existing ones for a uniform look.
Budget-Friendly Pro Tips
For an extra layer of protection, check and clean your gutters while you’re up there. Clogged gutters can cause water to back up onto your roof, increasing the risk of leaks. Remember to always prioritize safety: use a sturdy ladder, wear non-slip shoes, and never work on the roof when it’s wet or icy. With these easy, cost-effective steps, you’ll save money while keeping your home protected year-round.
6. Knowing When to Call a Professional
While do-it-yourself roof inspections and basic maintenance can help you save money and extend your roof’s lifespan, it’s crucial to recognize when a situation is beyond your skill set or could put your safety at risk. Here are some guidelines for knowing when it’s time to call in a professional roofer:
Recognizing Serious Roof Problems
If you notice extensive shingle damage, sagging areas, persistent leaks, or signs of mold and rot, these are red flags that require expert attention. Attempting to fix structural issues on your own can lead to bigger problems and higher costs down the road.
Safety Risks You Shouldn’t Take
Any work involving steep slopes, multi-story homes, or unstable surfaces should be left to trained professionals with the proper equipment. Your safety comes first, and no cost savings are worth risking a fall or injury.
When Repairs Get Complicated
If you’re unsure about the source of a leak, the extent of storm damage, or how to properly repair flashing or underlayment, it’s better to invest in an inspection by a licensed roofer. Professionals can diagnose hidden issues and guarantee repairs meet local building codes.
The Bottom Line: Protect Your Investment
Routine DIY maintenance is smart, but don’t hesitate to call in help for anything that feels out of your depth. A professional assessment can prevent minor problems from becoming expensive headaches—saving you money and keeping your home safe in the long run.