1. Assess Your Space and Set a Budget
Before you pick up a paintbrush, take a thoughtful walk through your home and make note of the rooms or areas that feel tired or outdated. Look for scuffed walls, faded colors, or spaces that just don’t spark joy anymore. Make a quick checklist—maybe it’s the entryway that needs brightening up, or the living room that could use a fresh, modern hue. Once you’ve identified which spaces need attention, it’s time to get practical about your budget. Figure out how much you can comfortably spend on your painting project without stretching your finances too thin. This means considering not just paint costs, but also supplies like brushes, rollers, painter’s tape, and drop cloths. Setting a clear budget from the start will help you prioritize projects and avoid overspending. Remember, refreshing your home doesn’t have to be expensive—a little planning goes a long way toward getting the most bang for your buck while creating a space you love.
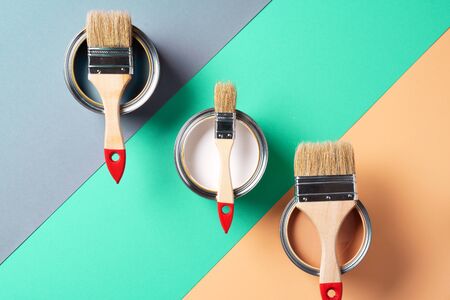
Pick the Right Paint and Tools
Choosing the right paint and tools is crucial when you want to refresh your home without breaking the bank. First, consider which rooms or surfaces you plan to update, then focus on selecting cost-effective options that deliver good results. American hardware stores like Home Depot, Lowe’s, or even Walmart often offer their own affordable paint brands. These store brands can be just as reliable as premium labels for interior projects, especially if you’re painting low-traffic areas like bedrooms or ceilings.
Types of Paint: What’s Worth Your Money?
| Paint Type | Best For | Budget Tip |
|---|---|---|
| Flat/Matte | Ceilings & Low-Traffic Walls | Usually cheapest, hides imperfections well |
| Satin/Eggshell | Living Rooms, Hallways | Good durability at a reasonable price |
| Semi-Gloss/Gloss | Kitchens, Bathrooms, Trim | Easy to clean but may cost a bit more |
If you’re not sure how much paint you’ll need, many stores offer online calculators—just plug in your room dimensions. Buying only what you need saves money and reduces waste.
Essential Tools Without the Splurge
You don’t need a professional kit to get great results. Stick to these basics:
- Rollers and roller covers (look for multipacks)
- A couple of angled brushes for corners and trim
- Painters’ tape to keep lines crisp
- A sturdy paint tray
Skip specialty gadgets unless you have a unique project. Dollar stores or big-box chains often carry affordable versions of these essentials. If you prefer shopping online, check Amazon or Target for competitive prices—and always read reviews before buying.
Quick Cost Comparison: In-Store vs. Online
| Item | Local Store Price Range | Online Retailer Price Range |
|---|---|---|
| Gallon of Interior Paint | $18-$35 | $20-$40 (plus shipping) |
| Roller Set (with tray) | $8-$15 | $10-$18 |
The key is to resist impulse buys—stick to what you truly need for your DIY project. A little planning goes a long way toward refreshing your home affordably.

3. Plan a DIY Painting Schedule
One of the biggest challenges for many Americans looking to update their home is finding the time to actually get started. Between work, family, and other commitments, it can feel impossible to tackle even a simple paint project. The good news is, you don’t need to dedicate an entire week or take vacation days just to refresh your space. Instead, set aside manageable time slots—think a few hours on weekends or a couple of evenings during the week. By breaking your painting projects into bite-sized sessions, you’ll find it much easier to fit them into your busy lifestyle. This approach not only keeps things stress-free but also helps you maintain energy and enthusiasm throughout the process. Whether youre touching up trim in the living room or giving your front door a bold new color, planning ahead ensures you can make steady progress without feeling overwhelmed. Remember, even small changes add up over time, and a little organization goes a long way toward achieving that fresh look on a budget.
4. Focus on High-Impact Areas
If you’re working with a tight budget, it’s smart to concentrate your painting efforts on areas that offer the most noticeable transformation for the least amount of money and time. Rather than repainting every wall in your home, target high-impact spots like accent walls, front doors, and trim. These small changes can create a dramatic visual difference and instantly refresh the vibe of your space.
Why Target Key Spots?
Focusing on key areas allows you to make bold design statements without breaking the bank. By choosing strategic locations, you maximize your paint investment and avoid unnecessary labor or materials. Plus, these updates are quick weekend projects that don’t require professional help.
High-Impact Painting Ideas
| Area | Project Idea | Estimated Cost Range |
|---|---|---|
| Accent Wall | Pick a vibrant color for one wall in your living room or bedroom | $30-$60 (1 gallon) |
| Front Door | Paint your entry door with a bold, welcoming shade | $20-$50 (quart-sized exterior paint) |
| Trim & Baseboards | Refresh worn or dated trim with crisp white or contrasting color | $25-$40 (1 quart) |
Real-Life Example:
Imagine you have a neutral living room but want to add some personality. Instead of repainting the entire space, try painting just one wall behind your sofa in a deep navy or cheerful teal. Or, if your curb appeal needs a boost, give your front door a makeover with a pop of red or yellow—an affordable update that wows guests and neighbors alike.
Tips for Maximum Impact
- Choose colors that complement your existing décor.
- Use painter’s tape for clean lines around trim and edges.
- If possible, use leftover paint from previous projects to save even more.
Tackling high-impact areas is an efficient way to refresh your home’s look while staying within budget—proving that sometimes, less really is more when it comes to DIY paint projects.
5. Add Personality with Creative Touches
One of the best ways to make your home truly yours—without breaking the bank—is by incorporating creative, budget-friendly paint projects. Simple DIY techniques like color blocking, using stencils, and upcycling old furniture can add tons of personality to your space while keeping costs low.
Color Blocking for Bold Statements
Color blocking is a trendy yet simple technique that involves painting sections of a wall in contrasting or complementary colors. You don’t have to be a pro—just use painter’s tape to outline geometric shapes or stripes on your walls, then fill them in with your chosen shades. It’s an affordable way to give any room a modern vibe, whether you’re updating a bedroom accent wall or creating a statement entryway.
Stencils for Custom Designs
If you love patterns but wallpaper isn’t in the budget, stencils are your new best friend. There are countless stencil designs available online or at craft stores, from classic florals to bold geometrics. All you need is a stencil, some paint, and a little patience. Try adding a stenciled border in your kitchen, creating an accent above your headboard, or even giving your staircase risers a unique touch.
Upcycle Old Furniture
Don’t toss that tired dresser or coffee table—give it new life with paint! Upcycling furniture is not only eco-friendly but also incredibly cost-effective. Sand down the piece, choose a color that fits your style, and get painting. You can even combine techniques like color blocking or stenciling for added flair. Swap out knobs or handles for a fresh look without spending much.
Keep It Personal and Practical
The key is to choose projects that reflect your taste and fit within your schedule and budget. Start small if you’re new to DIY; even painting picture frames or planters can make a difference. Remember, these creative touches aren’t just about looks—they help turn any house into a true home.
6. Care Tips to Make Your Paint Job Last
Once you’ve invested time and money into refreshing your home with budget-friendly paint projects, it’s important to make that new look last. Proper care not only preserves the beauty of your painted surfaces but also enhances durability, ensuring your spaces stay vibrant for years to come. Here are some simple, practical tips tailored for American homes:
Clean Surfaces Gently and Regularly
Dust and dirt can dull painted walls over time. Use a soft cloth or a sponge with mild soap and water to gently wipe away grime. Avoid harsh chemicals or abrasive scrubbers, as these can damage the finish.
Tackle Stains Quickly
Accidents happen—especially if you have kids or pets. Address spills and stains as soon as possible using a damp cloth. For tougher spots, a solution of water and gentle dish soap usually does the trick without harming the paint.
Avoid Excess Moisture
Bathrooms and kitchens are prone to moisture, which can lead to peeling or bubbling paint. Use exhaust fans when cooking or showering, and wipe down surfaces if they get wet. If you spot any signs of mold or mildew, treat them promptly to protect your paintwork.
Touch Up as Needed
Keep a small amount of leftover paint in a sealed container for future touch-ups. A quick dab on nicks or scuffs will keep your walls looking freshly painted without the need for a full redo.
Protect High-Traffic Areas
Entryways, hallways, and kids’ rooms tend to see more wear and tear. Consider adding washable wall coverings or applying an extra coat of durable finish in these areas. Area rugs, furniture placement, and wall bumpers can also help minimize impact.
Regular Inspections Pay Off
Make it a habit to check your painted surfaces every few months. Early detection of chips, cracks, or discoloration allows you to address minor issues before they turn into bigger (and costlier) problems.
By following these straightforward care tips, you’ll maximize the lifespan of your budget-friendly paint projects—keeping your home looking fresh, welcoming, and renewed year after year.