1. Recognizing Signs of Frozen Pipes
If you live in a region where winter brings freezing temperatures, knowing how to spot frozen pipes can save you from major headaches and expensive repairs. Catching the early warning signs is the first step in safely thawing and repairing frozen pipes before they burst or cause water damage in your home.
Common Symptoms of Frozen Pipes
Pipes that have frozen are usually easy to recognize if you know what to look for. Here are some typical signs:
| Sign | Description |
|---|---|
| Reduced Water Flow | Your faucets may only let out a trickle or no water at all, especially on particularly cold days. |
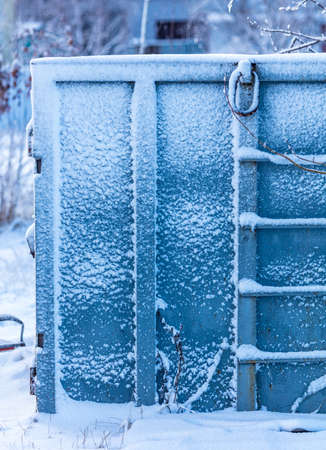
| Frost on Pipes | You might see visible frost or ice on exposed pipes, often in basements, crawl spaces, or under sinks. |
| Unusual Noises | You could hear strange sounds like banging, clanking, or gurgling when you turn on the tap; this happens when water struggles to move through ice inside the pipe. |
Where to Look for These Signs
- Check pipes along exterior walls or in unheated areas (basements, attics, garages).
- Look under kitchen and bathroom sinks, especially if they are against outside walls.
Why Early Detection Matters
Recognizing these symptoms early helps prevent costly water damage. Frozen pipes can crack or burst as water expands when it freezes, so acting quickly gives you a better chance of thawing them before any serious harm occurs.
2. Immediate Steps to Take When You Suspect Frozen Pipes
If you think your pipes might be frozen, acting quickly can help prevent a major plumbing disaster like a burst pipe and water damage. Here’s what you should do right away:
Shut Off the Main Water Supply
The first thing to do is turn off your home’s main water supply. This helps minimize water pressure inside the pipes, reducing the risk of a burst if the frozen area cracks. Most main shut-off valves are located in basements, crawlspaces, or near where the water line enters your house.
How to Find and Use Your Main Shut-Off Valve
| Location | What to Do |
|---|---|
| Basement/Crawlspace | Look for a valve near the front foundation wall, close to where the main water line comes in. |
| Utility Room/Garage | Check along exterior walls or near your water heater. |
| Outside (in warm climates) | The shut-off may be in an underground box with a removable lid. |
Open All Faucets
After turning off the main water supply, open all faucets throughout your house—both hot and cold. This relieves any remaining pressure in the pipes and allows water and steam to escape as you thaw them. It also helps you see if water starts flowing again, which means the ice is melting.
Locate the Frozen Section
If possible, try to find out which pipe or section is frozen. Common signs include only a trickle of water coming out of faucets, frost on exposed pipes, or bulging areas. Focus on pipes that run along exterior walls or through unheated spaces like attics and garages.
Quick Checklist: What To Do When Pipes Freeze
| Step | Description |
|---|---|
| 1. Shut off main water supply | Prevents potential flooding from a burst pipe. |
| 2. Open all faucets | Lowers pressure and lets melted ice escape safely. |
| 3. Locate frozen area | Look for obvious signs like frost or lack of running water. |
Remember:
If you’re unable to locate or access the frozen section—or if you notice signs of a burst pipe such as leaks or pooling water—call a licensed plumber immediately. Taking these urgent steps can help minimize damage and keep your home safe during cold snaps.

3. Safe Thawing Techniques
When you discover a frozen pipe in your home, its important to thaw it safely to avoid damage and potential water leaks. Here are some tried-and-true methods that many American homeowners use:
Recommended Methods for Thawing Frozen Pipes
| Tool/Method | How to Use | Safety Tips |
|---|---|---|
| Hair Dryer | Plug in a hair dryer and direct warm air back and forth along the frozen section of the pipe. Start close to the faucet and work towards the coldest part. | Keep away from standing water to avoid electric shock. Don’t leave unattended. |
| Heating Pad | Wrap an electric heating pad around the frozen pipe and set it to medium or high. Leave it on until water flows freely again. | Ensure the pad is dry and not damaged. Do not use if the pipe is leaking. |
| Space Heater | Place a space heater several feet from the frozen pipe, allowing the heat to gradually warm the area. | Keep flammable items away. Never leave a space heater running unattended. |
| Warm Towels | Soak towels in hot water, wring them out, and wrap them around the pipe. Replace as needed when they cool off. | Avoid open flames or boiling water directly on pipes. |
What Not To Do
- No Open Flames: Never use a blowtorch, propane heater, or any open flame device. This can cause pipes to burst or even start a fire.
- No Boiling Water: Pouring boiling water can crack or damage certain types of pipes, especially PVC or older metal pipes.
If You Cant Locate the Frozen Section
If you’re unable to find where your pipe is frozen or if you suspect it’s behind a wall, consider turning up your home’s thermostat and opening cabinet doors under sinks to allow more heat to reach hidden pipes.
When to Call a Professional Plumber
If your efforts arent successful within an hour, or if you notice any cracks, leaks, or hear unusual sounds, contact a licensed plumber right away. Acting fast helps minimize damage and costly repairs.
4. DIY Repairs for Minor Pipe Damage
Patching Small Leaks
If you notice a small leak after thawing your pipes, quick action can help prevent further water damage. Here are some simple ways to patch minor leaks until you can get professional assistance:
| Method | What You Need | How to Apply |
|---|---|---|
| Epoxy Putty | Plumber’s epoxy putty (available at hardware stores) | Knead the putty as directed, press it over the leak, and smooth it out. Allow it to harden for the recommended time. |
| Rubber Patch & Clamp | A piece of rubber (like an old hose) and a pipe clamp or adjustable hose clamp | Wrap the rubber around the leak, then secure it tightly with the clamp. This creates a temporary seal. |
| Pipe Repair Tape | Self-fusing silicone repair tape or waterproof pipe tape | Wrap the tape tightly around the leaky area, overlapping several times for best results. |
Using Pipe Repair Kits
Pipe repair kits are available at most home improvement stores and usually include all you need to temporarily stop a minor leak. These kits often feature fiberglass wraps that activate with water or resin compounds that harden quickly. Just follow the instructions on the package for safe application.
Applying Temporary Fixes Until Help Arrives
If the leak is more than a pinhole but not gushing, here are a few tips to minimize water damage:
- Shut off Water Supply: Always turn off the main water valve before attempting repairs.
- Cushion Buckets or Towels: Place buckets or towels under leaks to catch drips and protect flooring.
- Monitor the Area: Check your temporary fix regularly for any signs of worsening leaks.
- Call a Plumber: Even with a good patch, contact a licensed plumber as soon as possible for a permanent solution.
Quick Reference Table: Temporary Leak Fixes
| Problem | Temporary Solution | When to Call a Pro |
|---|---|---|
| Pinhole Leak | Tape or epoxy putty patch | If leak persists or pipe is corroded |
| Cracked Pipe (not burst) | Rubber patch and clamp or repair kit wrap | If crack spreads or water pressure drops significantly |
| Burst Section | Main shut-off only; do not attempt DIY fix | Immediately—requires professional replacement |
5. When to Call a Professional Plumber
Sometimes, thawing and repairing frozen pipes is more complicated than it seems. While many homeowners can handle minor freezes themselves, there are specific situations when calling a professional plumber is the safest and smartest choice. Understanding when you need expert help can prevent further damage and save you money in the long run.
Signs You Need a Pro
| Situation | Why Call a Plumber? |
|---|---|
| You suspect a pipe has burst | Burst pipes can cause extensive water damage and require immediate repair skills and tools |
| You cannot locate the frozen section | Plumbers use specialized equipment to find and safely thaw hidden frozen areas |
| No water comes out after thawing attempts | This may indicate a blockage or more serious problem that needs professional attention |
| You notice leaks after thawing pipes | Even small leaks need quick repairs to avoid mold, structural issues, or higher bills |
| Pipes are inside walls or hard-to-reach places | Professionals know how to access and fix pipes without causing extra damage to your home |
What a Professional Plumber Can Do for You
- Inspect for hidden damage: Experts look for cracks, weakened joints, or other issues that might not be visible.
- Safely repair burst or leaking pipes: Plumbers have the right tools and materials to make lasting repairs quickly.
- Recommend preventive measures: They can suggest ways to insulate pipes or improve heating to prevent future freezes.
- Restore water safely: After repairs, plumbers will ensure your plumbing system is safe before restoring full water flow.
Emergency Plumbing Help: What to Expect
If you call an emergency plumber, be ready to explain the problem clearly. Let them know if youve turned off the main water valve and if you see any visible flooding or water damage. Most reputable plumbers in the U.S. offer 24/7 emergency services during cold snaps because frozen pipes are a common winter issue. Having a trusted local plumber’s contact information handy can make all the difference during an urgent situation.
6. Tips for Preventing Frozen Pipes
Taking steps to prevent your pipes from freezing is much easier and less expensive than repairing damage after the fact. Here are some practical, American home-tested tips to help keep your plumbing safe during cold snaps:
Insulate Your Pipes
Proper insulation is one of the best defenses against frozen pipes. Focus on areas most at risk, such as basements, crawl spaces, attics, garages, and any exterior walls. Use foam pipe insulation sleeves or wrap pipes with heat tape designed for residential use. Hardware stores across the U.S. carry these materials, and theyre easy to install yourself.
Common Pipe Insulation Materials
| Material | Best For | Where to Find |
|---|---|---|
| Foam Tubes | Most indoor pipes | Home improvement stores |
| Fiberglass Wrap | Pipes in extremely cold spots | Plumbing supply stores |
| Heat Tape/Cable | Pipes at highest risk of freezing | Hardware stores |
Keep Heat Circulating
- Set your thermostat to at least 55°F (13°C), even when away from home.
- Open cabinet doors under sinks—especially along exterior walls—to let warm air reach the pipes.
- If possible, allow a trickle of water to run from faucets overnight during extreme cold. Moving water freezes more slowly.
Seal Up Drafts and Leaks
Cold air leaking through cracks and holes can quickly freeze nearby pipes. Use caulk or spray foam to seal gaps around windows, doors, cable entry points, and where pipes enter your home’s foundation.
Disconnect Outdoor Hoses and Shut Off Exterior Faucets
- Remove garden hoses and store them indoors before the first freeze.
- If you have a shut-off valve for outdoor faucets (sometimes called “hose bibs”), turn it off and drain any remaining water from the line.
Add Extra Protection During Severe Weather
- If you know a deep freeze is coming, consider wrapping vulnerable pipes with towels or newspaper for added insulation.
- You can also place a portable space heater (never leave it unattended) in unheated areas like garages or basements where pipes are exposed.
Pipes Most at Risk for Freezing:
- Pipes running along exterior walls without adequate insulation
- Pipes in unheated interior spaces (attics, basements, crawl spaces)
Taking these proactive steps can help keep your plumbing system safe through even the harshest American winters—and save you from costly repairs down the road!