1. Planning and Preparation
Before you dive into your cabinet refacing project, its important to take time for proper planning and preparation. This first step will help make sure everything goes smoothly and that you get the results youre looking for.
Assess Your Existing Cabinets
Start by checking the condition of your current cabinets. Refacing works best when the cabinet boxes (also called carcasses) are in good shape. Make sure they’re sturdy, with no water damage, mold, or structural issues. Doors and drawer fronts can be replaced, but the frames need to be solid.
Checklist for Cabinet Assessment:
| Component | What to Look For |
|---|---|
| Cabinet Boxes | No cracks, warping, or water damage |
| Hinges & Hardware | Still functional or easy to replace |
| Surface Condition | Cleanable and sandable surfaces |
Choose Your New Style
This is the fun part! Decide what look you want—modern, farmhouse, traditional, or something custom. You’ll be choosing new cabinet doors and drawer fronts, as well as veneer or laminate to cover the existing cabinet boxes. Also think about hardware like knobs and pulls for a complete refresh.
Popular Cabinet Styles:
| Style | Description |
|---|---|
| Shaker | Crisp lines, simple frame design – perfect for modern or transitional kitchens |
| Raised Panel | A classic look with depth; great for traditional styles |
| Sleek Slab | Smooth flat panels – ideal for contemporary spaces |
Gather Necessary Tools and Materials
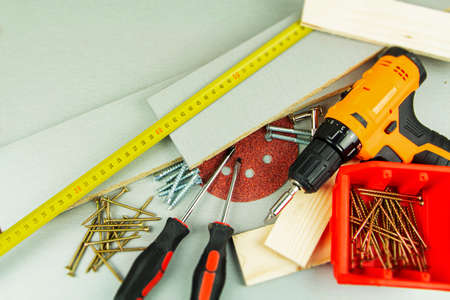
You’ll need a few essential tools to get started. If you don’t already have them, most can be found at your local hardware store or ordered online.
Basic Tool List:
- Screwdriver or drill (for removing doors and hardware)
- Tape measure and pencil (for accurate cuts and placement)
- Sanding block or electric sander (to prep surfaces)
Create a Ready Workspace
A clean, organized workspace makes the job easier and safer. Clear out your kitchen or work area, lay down drop cloths to protect floors, and set up a table or bench for working on doors. Make sure there’s plenty of lighting so you can see details clearly.
2. Removing Cabinet Doors and Hardware
Before you can start refacing your kitchen cabinets, the first hands-on step is to carefully remove all cabinet doors, drawers, and hardware. This helps create a clean surface for applying new veneers or paint and ensures your pieces are safe from accidental damage.
What You’ll Need:
- Screwdriver or power drill
- Masking tape
- Permanent marker or pen
- Ziploc bags or small containers
- Sticky notes (optional)
Step-by-Step Instructions:
Step 1: Unscrew Doors and Drawer Fronts
Using a screwdriver or power drill, carefully remove each cabinet door from its hinges. If your drawers have removable fronts, unscrew those as well. Be gentle to avoid stripping screws or damaging the wood.
Step 2: Remove All Hardware
This includes knobs, handles, hinges, and any other metal components. Store these in labeled plastic bags or containers. Keep screws with their corresponding hardware to make reassembly easier later.
Step 3: Label Everything
This step is crucial for putting everything back in the right place. Use masking tape and a marker to label each door and drawer with its original location (e.g., “Upper Left #1” or “Lower Right #3”). Stick the label on the inside of the door or drawer where it won’t be seen once reinstalled.
Step 4: Store Items Safely
Laying out your doors and drawers in an organized way will make the refacing process smoother. Place them in a clean, dry area—preferably flat—to avoid warping. Here’s a quick reference table for organizing your parts:
| Item | Label Example | Storage Tip |
|---|---|---|
| Cabinet Door | “Upper Left #1” | Labeled with masking tape; stacked flat on a towel |
| Drawer Front | “Lower Right #3” | Labeled on back; stored upright against wall |
| Screws & Hinges | “Door #1 Hardware” | Ziploc bag labeled to match door/drawer number |
Pro Tip:
If you’re working on multiple cabinets at once, take photos before removing anything. These reference pictures can help you remember how everything was originally arranged when its time to reassemble.

3. Surface Cleaning and Sanding
Before you can apply any veneer, paint, or new cabinet doors, its crucial to start with a clean and smooth surface. This step helps ensure that everything adheres properly and stays in place for years to come. Let’s walk through how to clean and sand your cabinets the right way.
Why Cleaning and Sanding Matter
Cabinet surfaces collect grease, dust, and grime over time — especially in kitchens. If you skip cleaning or sanding, your new finish might peel or not stick at all. Taking the time to prep properly saves you from problems down the road.
What You’ll Need
| Item | Purpose |
|---|---|
| Mild detergent or degreaser | Removes grease and dirt |
| Sponge or soft cloth | Cleans without damaging surfaces |
| Buckets of warm water | Used for rinsing off cleaner |
| Towel or microfiber cloth | Dries surfaces completely |
| 120- to 150-grit sandpaper or sanding sponge | Smooths out surface and improves adhesion |
| Tack cloth or vacuum with brush attachment | Removes sanding dust |
Step-by-Step Instructions
Step 1: Remove Cabinet Hardware
If you haven’t already, take off all handles, knobs, hinges, and other hardware using a screwdriver. Keep them organized in labeled bags so it’s easy to reinstall later.
Step 2: Clean All Surfaces Thoroughly
Dilute a mild detergent or use a degreaser specifically designed for kitchen use. Wipe down all cabinet frames, doors, drawers, and side panels with a sponge or cloth. Pay extra attention to areas around handles where oils build up. Rinse with clean water and dry completely with a towel.
Step 3: Lightly Sand the Surfaces
Use 120- to 150-grit sandpaper or a sanding sponge to lightly scuff all surfaces that will be painted or veneered. You don’t need to remove the old finish completely—just enough to dull the gloss and create a surface the new material can grip onto.
Step 4: Remove Dust from Sanding
Sanding creates fine dust that can ruin your finish if left behind. Use a tack cloth to wipe down all surfaces thoroughly, or vacuum using a brush attachment for hard-to-reach spots.
Pro Tip:
If your cabinets have any glossy coating, make sure to sand those areas a bit more carefully. The shinier the surface, the harder it is for paint or veneer to stick without proper prep.
You’re Ready for the Next Step!
Your cabinets should now be clean, smooth, and ready for their transformation. Up next: applying veneer or primer—depending on which refacing method you choose.
4. Applying Veneer or Paint
Now that your cabinet frames and doors are prepped, it’s time to give them a fresh new look. You can either apply veneer sheets for a wood-like finish or go with paint for a modern, colorful upgrade. Both options can dramatically change the feel of your kitchen without replacing your entire cabinetry.
Choosing Between Veneer and Paint
| Option | Pros | Cons |
|---|---|---|
| Veneer Sheets | Real wood look, durable, high-end finish | More prep work, requires precise application |
| Paint | Budget-friendly, customizable colors, easier to apply | May require touch-ups over time, less texture |
How to Apply Veneer Sheets
- Measure and Cut: Measure each cabinet surface and cut veneer sheets slightly larger than needed.
- Apply Adhesive: Use contact cement or peel-and-stick adhesive on both the cabinet surface and the back of the veneer.
- Attach Veneer: Carefully align the veneer and press it onto the surface from top to bottom. Use a roller to smooth out air bubbles as you go.
- Trim Edges: Use a sharp utility knife or veneer trimmer to remove any excess material around the edges.
How to Paint Cabinets
- Select Paint Type: Use high-quality latex or acrylic paint designed for cabinets. Semi-gloss or satin finishes work best in kitchens.
- Prime First: Apply a coat of primer if youre painting over wood or dark finishes. Let it dry completely.
- Apply Paint: Use a foam roller for flat surfaces and a brush for corners. Apply thin coats and let each coat dry before adding another.
- Smooth Finish: Lightly sand between coats with fine-grit sandpaper for a smooth, professional look.
Tips for Best Results
- Work in a dust-free area to avoid particles sticking to wet paint or adhesive.
- If using veneer, always test a small piece before committing to full application.
- Use painter’s tape to protect surrounding areas from paint drips or adhesive spread.
- Avoid rushing—let each layer of paint or adhesive fully cure before moving on to the next step.
This step is where your cabinets really start to transform, so take your time and focus on clean lines and smooth finishes.
5. Reinstalling Doors and Hardware
Now that your cabinet boxes are freshly refaced, it’s time to bring everything back together by reinstalling the doors and hardware. Whether you’re using the original doors or brand-new ones, this step is crucial for both appearance and functionality.
Step 1: Gather Your Materials
Before starting, make sure you have all the necessary items on hand. Heres a quick checklist:
| Item | Purpose |
|---|---|
| Screwdriver or drill | To attach hinges and hardware |
| Level | To ensure doors hang evenly |
| Screws | For securing hinges and handles |
| Hinges (new or reused) | To mount doors to cabinet frames |
| Handles or knobs | For opening and closing doors easily |
Step 2: Attach Hinges to Doors First
If you removed the hinges during the refacing process, start by reattaching them to the cabinet doors. Line up each hinge in its original position (or follow manufacturer instructions if using new ones), then screw them in tightly.
Step 3: Mount the Doors Back onto Cabinets
Once the hinges are on the doors, align each door with its corresponding cabinet box. Use a level to ensure they hang straight before tightening all screws. Don’t worry if it takes a few tries—door alignment can be finicky!
Pro Tip:
If your doors aren’t closing properly or seem uneven, use the adjustment screws on modern European-style hinges to tweak the height, side-to-side position, or depth. This small detail makes a big difference.
Step 4: Reattach Handles or Knobs
If youre reusing old hardware, simply screw them back into their original positions. If youre upgrading to new knobs or pulls, take a moment to measure and mark where each should go so theyre consistent across all doors and drawers.
Troubleshooting Common Issues:
| Issue | Solution |
|---|---|
| Doors not aligned properly | Adjust hinge screws until level and even spacing is achieved |
| Squeaky hinges | Add a drop of lubricant or tighten loose screws |
| Crooked hardware | Use a template or jig for accurate placement next time |
This part of your cabinet refacing project brings everything together visually. Take your time here—it’s worth it when those freshly-faced cabinets open smoothly and look great!
6. Final Touches and Clean-Up
Now that youve completed the main steps of refacing your cabinets, its time to focus on the final touches and clean-up. This part may not seem as exciting, but it’s essential to make your cabinets look professionally done.
Inspect Your Work
Take a slow walk around your kitchen or bathroom and carefully inspect each cabinet door, drawer front, and frame. Look for:
- Uneven edges or misaligned doors
- Loose hardware like handles or hinges
- Bubbles or wrinkles in veneer or laminate
- Missed spots in paint or finish
If you find any flaws, take the time to fix them now. Use touch-up paint, tighten screws, or reapply adhesive where needed. These little fixes make a big difference in how polished your cabinets will look.
Clean Your Workspace
A clean workspace is the final step to wrapping up your DIY project right. Remove all tools, leftover materials, and debris from the area. Here’s a quick checklist to help you stay organized:
| Task | Details |
|---|---|
| Wipe down surfaces | Use a damp cloth to remove dust and fingerprints from cabinet doors and frames |
| Vacuum or sweep floors | Pick up sawdust, wood shavings, and small debris |
| Store tools properly | Return drills, screwdrivers, and other tools to their original storage spots |
| Dispose of waste materials | Toss out old cabinet pieces and packaging in accordance with local recycling rules |
Enjoy Your New Cabinets!
This is the moment you’ve been working toward—stepping back and admiring your freshly refaced cabinets. They not only look brand new but also reflect the hard work and care you put into your home. Whether youre cooking dinner or hosting friends, youll be proud every time you open one of those doors.

