Personal Protective Gear
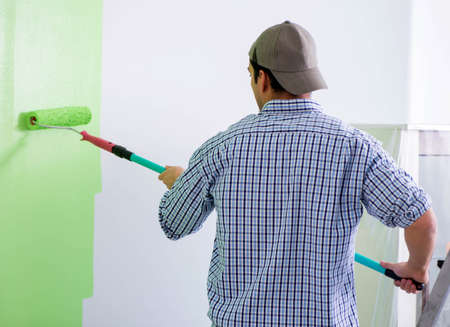
When tackling any wall repair project, your safety should always come first. The process often stirs up dust, exposes you to potential electrical wires, and may even put you near unstable structures. That’s why it’s crucial to gear up properly before you start. Always wear safety goggles to shield your eyes from flying debris and dust particles that can cause irritation or injury. A quality dust mask will protect your lungs from inhaling harmful particles, especially when sanding drywall or breaking through plaster. Don’t forget sturdy gloves—they not only keep your hands safe from sharp objects and rough surfaces but also provide a better grip on tools. Finally, choose work clothing that covers your arms and legs; long sleeves and pants made from durable material can help prevent scrapes, cuts, and even chemical exposure if you’re using strong cleaning agents or adhesives. By suiting up with the right protective gear, you set the foundation for a safer and more efficient wall repair experience.
Dust Control and Clean-Up
Managing dust is a crucial part of wall repair, not only for keeping your home clean but also for protecting your health. Construction dust can contain harmful particles like silica, drywall compounds, or even lead if you’re working in older homes. Here are some practical strategies to minimize dust spread and ensure safe clean-up during and after wall repairs.
Tips for Minimizing Dust Spread
- Seal Off Work Areas: Use plastic sheeting and painter’s tape to isolate the repair zone from the rest of your home. Close doors and cover vents to prevent dust from traveling through your HVAC system.
- Remove or Cover Furniture: Take out as much furniture as possible before starting work. Any remaining items should be covered with drop cloths or plastic sheets.
- Wet Cutting/Sanding: Whenever possible, use tools designed for wet cutting or wet sanding. Adding moisture reduces airborne dust significantly.
Using Tools with Dust Collectors
Many modern power tools come equipped with dust collection systems. Using these tools can greatly reduce the amount of airborne debris during wall repair. If you don’t have specialized equipment, you can often rent it from local hardware stores. Here’s a quick comparison:
| Tool Type | Dust Collection Feature | Best Use Case |
|---|---|---|
| Sander with Vacuum Attachment | Integrated hose connects to shop vac | Smoothing drywall patches |
| Circular Saw with Dust Port | Directs dust into bag or vacuum | Cutting drywall panels |
| Hand Tools (Manual) | N/A (use damp cloth to wipe) | Minor patchwork and touch-ups |
Safe Clean-Up Procedures
- Damp Wipe Surfaces: After repairs, use a damp cloth to wipe down walls, baseboards, and other surfaces where dust may have settled.
- HEPA Vacuum: Use a vacuum with a HEPA filter to clean floors and carpets. Standard vacuums can blow fine dust back into the air.
- Proper Disposal: Collect all debris and disposable coverings in heavy-duty trash bags. Seal bags tightly before disposal to prevent further dust release.
Clean-Up Checklist
| Task | Description |
|---|---|
| Damp wipe surfaces | Use microfiber cloths for best results |
| Vacuum all areas with HEPA filter | Pays special attention to corners and crevices |
| Dispose of debris properly | Tie off bags securely before taking outside |
Pro Tip:
If possible, schedule repairs when children or pets are not at home, as they are more susceptible to respiratory issues caused by airborne dust. By following these steps, you’ll keep your workspace safer and make post-repair clean-up a breeze.
3. Identifying Electrical Hazards
Before you start any wall repair project, its crucial to recognize the potential presence of electrical wires hidden behind your walls. American homes often have a complex network of electrical wiring for outlets, switches, and lighting. Accidentally cutting or drilling into a live wire can result in serious injury or even fire. Start by checking for outlets, switches, and appliances on both sides of the wall—these are strong indicators that wires may be present. Use a stud finder with a built-in wire detection feature, or an electronic voltage detector, to help pinpoint where wires might be running. Always mark these areas clearly to avoid them during your repair work.
Shutting Off Power
Never begin cutting, drilling, or sanding until you’ve shut off power to the area you’ll be working on. Go to your breaker panel and turn off the circuit that supplies electricity to that section of the house. If you’re not sure which circuit controls which area, it’s safer to shut off power to the entire home while you work. After turning off the breaker, use a voltage tester at nearby outlets or switches to double-check that the power is completely off—never assume! This extra step can make all the difference in ensuring your safety while tackling wall repairs.
4. Safeguarding Against Hidden Pipes and Utilities
One of the biggest risks during wall repair is accidentally striking hidden utilities like plumbing pipes, gas lines, or electrical conduits. Damaging these can lead to costly repairs, serious injury, or even life-threatening situations. Before you cut, drill, or hammer into any wall, it’s crucial to take steps to locate and avoid these hidden dangers.
Identify Utility Locations Before You Start
Start by reviewing blueprints or home renovation records if available—they often indicate where utilities run behind walls. If you don’t have access to these documents, use a quality stud finder with deep-scanning capabilities that can detect not just wood studs but also metal pipes and live wires. Some advanced models can help differentiate between different materials within the wall.
Common Warning Signs of Hidden Utilities
| Utility Type | Warning Signs |
|---|---|
| Plumbing Pipes | Noisy pipes when water runs, visible pipe entry/exit points, nearby bathrooms/kitchens |
| Gas Lines | Distinctive sulfur smell (if leaking), gas meter nearby, labeled shut-off valves |
| Electrical Wires | Power outlets/switches on the same wall, circuit breaker panel location, conduit boxes in basement/crawlspace |
Best Practices for Safe Wall Work
- Turn off water, gas, or power supply to the area you’ll be working on whenever possible.
- Drill small pilot holes first to check for obstructions before making larger cuts.
- If your wall work is near kitchens, bathrooms, laundry rooms, or utility closets, proceed with extra caution—these areas are hotspots for hidden pipes and wires.
When in Doubt, Call a Professional
If you’re unsure about what’s behind your walls or suspect a utility line may be in your work area, it’s always safer to consult a licensed plumber or electrician. Many professionals offer inspection services that use specialized equipment to map out whats behind your drywall without causing damage. Taking this extra step can save you from expensive emergencies and ensure your safety throughout the repair process.
5. Maintaining Structural Integrity
When repairing walls, maintaining the structural integrity of your home is absolutely crucial. One of the first things to consider is whether you’re working on a load-bearing wall. Load-bearing walls support the weight of your house, and altering them without proper knowledge can lead to serious safety risks and even property damage. Always take time to research or consult your home’s blueprints to identify which walls are load-bearing before starting any repair or renovation work.
Recognizing Load-Bearing Walls
In most American homes, load-bearing walls are usually located in the center of the house and often run perpendicular to floor joists. However, this isn’t always the case, so if you have any doubts, it’s best to ask a professional contractor or a structural engineer for guidance. Don’t rely solely on guesswork—getting it wrong could compromise your home’s safety.
Avoiding Over-Cutting
It might be tempting to make larger openings for plumbing, wiring, or aesthetic reasons, but over-cutting into walls can weaken their structure. Always measure carefully and only cut what is necessary for your repair job. Use tools designed for precision cutting, and avoid removing any studs or supports unless you’re certain they aren’t crucial to the wall’s strength.
When to Seek Professional Help
If at any point during your wall repair project you suspect that the structure might be compromised—such as noticing cracks, sagging ceilings, or doors that no longer close properly—stop immediately and call a licensed contractor or structural engineer. These professionals can assess the situation and recommend safe solutions. Remember, it’s always better to err on the side of caution when your home’s safety is involved.
6. Safe Tool Usage and Ladder Safety
When tackling wall repairs, using the right tools safely is just as important as understanding the materials and structure of your home. Always start by inspecting your tools for any signs of damage or excessive wear—especially with power tools like drills, saws, or sanders. Use tools only for their intended purpose and make sure to follow manufacturer instructions for operation and maintenance. Wear protective gear such as safety goggles and gloves to protect yourself from flying debris and accidental slips. If youre using a utility knife or scraper, always cut away from your body and keep your hands clear of the blades path.
Ladder safety is another crucial aspect when working on walls, particularly when dealing with ceilings or high spots. Choose a sturdy ladder rated for your weight and ensure its set up on a flat, stable surface. Never stand on the top rung or overreach while on a ladder; instead, reposition it as needed to maintain balance and minimize strain. The “three-point contact” rule—keeping two hands and one foot, or two feet and one hand on the ladder at all times—can help reduce the risk of falls. For extra security, have someone hold the base of the ladder if possible. Remember: taking shortcuts with tool handling or ladder safety can lead to serious injuries, so always prioritize caution and best practices during every step of your wall repair project.