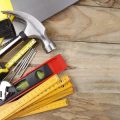
1. Understanding the Importance of Waterproofing
Before diving into finishing your basement, bathroom, laundry room, or any area prone to moisture, its essential to understand why waterproofing should come first. Skipping this step can lead to costly repairs down the line due to water damage, mold growth, and structural issues. Waterproofing acts as the foundation of a durable and long-lasting home improvement project.
Why Start with Waterproofing?
In areas like basements or bathrooms, moisture is always present—whether from external sources like groundwater or internal ones like humidity and plumbing. Without proper waterproofing, finishing materials such as drywall, flooring, and insulation are at risk of being damaged by water seepage or condensation.
Common Problems Caused by Poor Waterproofing
| Problem | Description | Potential Cost (Estimate) |
|---|---|---|
| Mold & Mildew Growth | Causes health issues and damages walls, ceilings, and floors. | $500 – $6,000+ |
| Wall & Floor Damage | Paint peeling, wood warping, and cracks in concrete. | $1,000 – $10,000+ |
| Structural Issues | Water compromises foundation integrity over time. | $5,000 – $30,000+ |
Protecting Your Investment
When you waterproof before finishing, youre not just preventing damage—you’re protecting everything that comes after: drywall installation, flooring upgrades, paintwork, electrical wiring, and more. Its a smart move that adds value to your home while saving you future headaches and expenses.
Long-Term Benefits of Proper Waterproofing
- Peace of Mind: Know that your finished space is protected from leaks and dampness.
- Increased Property Value: Homes with dry basements and well-maintained bathrooms sell better.
- Healthier Living Environment: Less mold means better air quality for your family.
- Lower Maintenance Costs: Preventative work now means fewer repairs later.
In short, waterproofing isn’t just a construction step—it’s a smart investment in your home’s future. Whether youre turning your basement into a game room or upgrading a bathroom for resale value, starting with waterproofing sets the stage for lasting results.
2. Identifying Problem Areas in Your Home
Before you start any waterproofing or finishing project, its crucial to first identify areas in your home that are vulnerable to water damage. Catching these issues early can save you from major repairs down the line. Here’s how to spot trouble areas and what signs to look out for.
Common Signs of Water Intrusion
Water intrusion isnt always obvious. Some signs can be subtle but still indicate a serious underlying problem. Keep an eye out for the following:
| Sign | Description |
|---|---|
| Cracks in Foundation Walls | Even small cracks can allow moisture to seep into your basement or crawl space. Horizontal cracks are especially concerning as they may indicate pressure from saturated soil. |
| Musty Odors | A persistent damp or musty smell is often a sign of hidden moisture, mold growth, or poor ventilation. |
| Visible Mildew or Mold | Mold typically appears as black, green, or white patches on walls, ceilings, or insulation. It thrives in moist environments and can spread quickly if not addressed. |
| Damp Spots or Staining | If you notice discoloration on drywall, flooring, or ceilings, it may be due to water leaks or condensation. |
| Bubbling Paint or Peeling Wallpaper | This can happen when moisture gets trapped behind wall surfaces. |
Where to Inspect First
Certain areas in your home are more prone to water problems than others. Focus your inspection on these key spots:
- Basements and Crawl Spaces: These are the most common areas for moisture intrusion due to their location below ground level.
- Around Windows and Doors: Improper sealing or flashing can let rainwater seep in.
- Roof and Attic: Look for signs of roof leaks, including dark spots on the ceiling or wet insulation.
- Laundry Rooms and Bathrooms: Plumbing leaks and poor ventilation often cause humidity buildup here.
- Kitchens: Check under sinks and around dishwashers for slow leaks.
How to Prioritize Repairs
If you find multiple problem areas, it’s important to prioritize which ones need immediate attention. Use the table below as a guide:
| Issue Severity | Description | Action Needed |
|---|---|---|
| High Priority | Mold growth, standing water, structural foundation cracks | Tackle immediately with professional help if needed |
| Medium Priority | Damp spots, mild musty odors, minor cracks | Plan repairs soon and monitor closely for changes |
| Low Priority | Bubbling paint, small stains with no active leaks | Add to maintenance list and recheck periodically |
Tip:
If youre unsure about the severity of an issue, its always a good idea to consult with a licensed contractor or waterproofing specialist before proceeding with finishing work.
A Quick DIY Checklist for Homeowners:
- [ ] Inspect basement walls for cracks or efflorescence (white powdery residue)
- [ ] Smell for any musty odors in lower levels of the home
- [ ] Check corners and edges near floors for dampness or mold spots
- [ ] Examine exterior drainage systems like gutters and downspouts for proper flow away from the foundation
- [ ] Use a moisture meter to test suspicious areas if available
Taking time now to thoroughly inspect your home will lay a solid foundation for any waterproofing efforts—and help you avoid costly surprises after finishing work is complete.

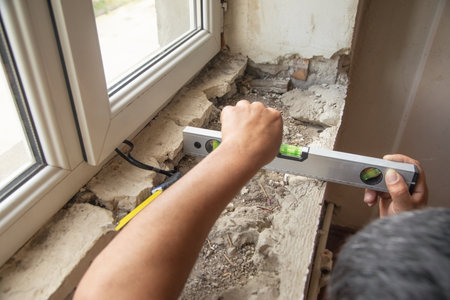
3. Choosing the Right Waterproofing Solutions
When it comes to waterproofing your basement or crawl space before finishing, choosing the right method is key to protecting your home in the long run. Different homes and climates call for different solutions, so its important to understand your options and how they perform.
Common Waterproofing Methods
Here’s a breakdown of the most common waterproofing solutions available:
| Method | Description | Best For | Pros | Cons |
|---|---|---|---|---|
| Sealants | Applied to walls or floors to block moisture | Minor dampness, hairline cracks | Easy DIY, affordable | Short-term fix, not effective for major leaks |
| Drainage Systems | Interior or exterior systems that redirect water away from the foundation | Areas with heavy rainfall or high water tables | Highly effective, long-term solution | Professional installation needed, higher cost |
| Vapor Barriers | Plastic or foil sheets installed on walls or floors to prevent moisture infiltration | Crawl spaces, humid climates | Controls humidity, prevents mold growth | Ineffective if used alone in wet areas |
Selecting the Right Solution for Your Home
Consider Your Local Climate
If you live in a region prone to heavy rain or snowmelt—like the Pacific Northwest or Midwest—you’ll likely need more than just surface sealants. A full drainage system combined with vapor barriers may be necessary.
Understand Your Home’s Needs
A newer home with minor seepage might only require sealants and a vapor barrier. But older homes with visible cracks or signs of standing water will benefit more from an interior or exterior drainage system.
Quick Tip:
If youre unsure what level of waterproofing your space needs, consider hiring a professional for a moisture inspection. This small investment can save you big money on future repairs.
Putting It All Together
The best waterproofing approach often combines multiple methods. For example, using a sealant to close small cracks, installing a vapor barrier on walls and floors, and adding an interior French drain system creates a strong defense against moisture damage. The key is customizing your approach based on where you live and how your home is built.
4. DIY vs. Hiring a Professional
When it comes to waterproofing your basement or any area before finishing, one of the biggest decisions youll face is whether to do it yourself or hire a licensed professional. Making the right choice can save you time, money, and stress in the long run.
When DIY Waterproofing Makes Sense
If youre dealing with minor moisture issues like condensation or small cracks in foundation walls, a DIY approach might be enough. There are plenty of homeowner-friendly products available at hardware stores—like waterproof sealants, crack fillers, and vapor barriers—that are easy to apply with basic tools and some patience.
Signs You Can Tackle It Yourself:
- Hairline cracks in concrete walls
- Slight dampness without standing water
- No visible mold or mildew growth
- You have experience with home improvement projects
When to Call in a Professional
More serious water problems require expert help. If your basement has standing water after rainstorms, large foundation cracks, or signs of structural movement, its best to leave it to the pros. Licensed contractors not only have the tools and skills but also understand local building codes that must be followed for safety and compliance.
Signs You Should Hire a Pro:
- Frequent flooding or pooling water
- Strong odors from mold or mildew
- Visible mold growth on walls or floors
- Bowing or shifting foundation walls
- You plan to finish the basement and want long-term protection
DIY vs. Professional: Side-by-Side Comparison
| Aspect | DIY Waterproofing | Professional Waterproofing |
|---|---|---|
| Cost | Lower upfront cost | Higher initial investment, but may save money long-term |
| Time & Labor | Time-consuming, especially for beginners | Faster completion by experienced crew |
| Tools & Materials Needed | You purchase and supply all materials/tools | Professionals bring specialized equipment and materials |
| Quality & Warranty | No warranty; quality depends on your skill level | Often comes with warranty and guaranteed results |
| Building Code Compliance | You’re responsible for knowing local codes | Professionals ensure everything meets code requirements |
Tip:
If youre unsure about the extent of your moisture issue, consider getting a free inspection from a waterproofing contractor. Many companies offer assessments without obligation, which can help you make an informed decision.
The bottom line is simple: know your limits. If its a small job and you feel confident in your abilities, go ahead with a DIY fix. But if theres any doubt—or if youre planning to finish the space soon—it’s worth investing in professional waterproofing services to protect your home for years to come.
5. Timing Your Finishing Work Post-Waterproofing
Once youve completed your waterproofing project, its tempting to move right into finishing—especially if youre eager to reclaim your basement or finish a new space. But jumping the gun can lead to long-term issues and expensive rework. Knowing when its safe to start finishing is key to protecting your investment.
How Long Should You Wait?
The drying and curing time largely depends on the type of waterproofing system you used, climate conditions, and the materials applied. Heres a general guide:
| Waterproofing Method | Recommended Waiting Time |
|---|---|
| Cementitious Waterproofing | 5–7 days |
| Liquid Membrane (e.g., epoxy or polyurethane) | 7–14 days |
| Sheet Membranes | Immediate for finishing prep, 2–3 days for joint sealing to cure |
| Exterior Drainage Systems | Depends on soil moisture; typically 7–10 days post-installation |
If youre unsure about drying times, always refer to the product manufacturer’s instructions or consult with your contractor.
Tips for Monitoring Waterproofing Effectiveness Before Finishing
You’ll want to be sure that your waterproofing actually works before closing up walls or installing flooring. Here are some tips to help you monitor effectiveness:
- Visual Inspections: Look for damp spots, discoloration, or musty smells over the next week after waterproofing.
- Tape Test: Tape a small piece of clear plastic sheeting (about 12×12 inches) on different wall or floor sections. Leave it for 48 hours. If condensation forms under the plastic, moisture is still present.
- Mold Check: Use a flashlight in corners and behind objects to inspect for early signs of mold growth.
- Use a Moisture Meter: These affordable tools help detect residual moisture in concrete or wood substrates.
What If You Spot Moisture?
If any signs of moisture appear during this waiting period, hold off on finishing work. Investigate the cause—it might be incomplete sealing, high humidity, or groundwater pressure. Address these issues before proceeding further.
Avoid Rushing—It Pays Off Later
No one wants to redo finished walls or replace damaged floors due to premature installation. Patience during this stage ensures your waterproofing system is doing its job—and that your finished space will stay dry and damage-free for years to come.