1. What Is Closing Day?
Closing day is one of the most important milestones in any real estate transaction in the United States. It’s the final step where ownership of a home officially transfers from the seller to the buyer. On this day, all parties involved—buyers, sellers, real estate agents, lenders, attorneys, and sometimes escrow officers—come together either in person or virtually to finalize all legal and financial details.
Why Is Closing Day Important?
Closing day marks the finish line for both buyers and sellers. All the hard work, negotiations, inspections, and paperwork lead up to this moment. After closing, buyers receive the keys to their new home and sellers receive payment for their property. It’s when everything becomes official and binding.
Who Is Involved on Closing Day?
| Role | Responsibility |
|---|---|
| Buyer | Signs documents, pays closing costs and receives keys |
| Seller | Signs documents and hands over property ownership |
| Real Estate Agent(s) | Guides clients, answers questions, ensures smooth process |
| Lender | Provides funds for buyer’s mortgage if applicable |
| Title/Escrow Officer | Handles funds transfer, document recording, and title insurance |
| Attorney (in some states) | Reviews documents and ensures legality of transaction |
The Typical Closing Day Process at a Glance:
- Final review of all paperwork by both buyer and seller
- Signing of all required legal documents (deed, mortgage agreement, etc.)
- Transfer of funds—buyer pays closing costs and down payment; lender provides loan funds if needed
- Transfer of property title from seller to buyer is recorded with local government
- Buyer receives keys to their new home!
A Key Moment in Homeownership
While closing day can feel overwhelming due to all the details involved, it’s truly an exciting milestone. Being prepared and understanding who is involved helps ensure everything goes as smoothly as possible.
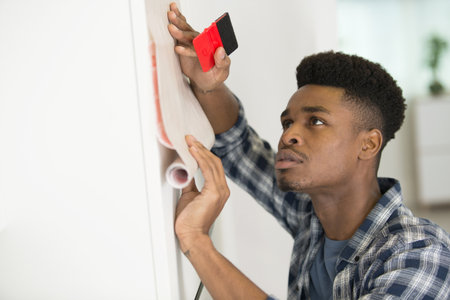
2. Final Walkthrough
The final walkthrough is an important step that happens just before you officially close on your new home. It’s your last chance to make sure the property is in the agreed-upon condition before the keys are handed over. This isn’t a home inspection, but rather a time to confirm that everything is as it should be and any repairs or conditions in your contract have been met.
What Happens During the Final Walkthrough?
Typically, the final walkthrough takes place within 24 hours before closing day. Your real estate agent will schedule this appointment, and you’ll walk through the home together, checking each room and space. The main goal is to ensure:
- No new damage has occurred since your last visit
- All agreed-upon repairs are completed
- The home’s systems and appliances are working properly
- Fixtures and items included in the sale remain with the property
Final Walkthrough Checklist
Use this checklist during your walkthrough to make sure nothing gets overlooked:
| Item | What to Check |
|---|---|
| Repairs | Verify all agreed-upon repairs are completed with receipts or proof of work if possible. |
| Appliances | Test kitchen appliances, washer/dryer, HVAC, and water heater to ensure they function. |
| Plumbing & Fixtures | Run faucets, flush toilets, check for leaks, and make sure all fixtures remain as negotiated. |
| Doors & Windows | Open/close all doors and windows to check locks and operation; verify screens are intact. |
| Lights & Electrical Outlets | Flip light switches and test outlets throughout the house. |
| Walls & Floors | Look for any new holes, stains, or damage that wasn’t there before. |
| Pest Issues | Check for any signs of pests or infestations. |
| Leftover Items & Cleanliness | Confirm seller has removed personal belongings and left the home “broom clean.” |
| Lawn & Exterior Areas | Walk around outside to ensure yard is maintained and agreed features (like sheds) remain. |
| Garage & Storage Spaces | Inspect garage doors, openers, attic, basement, and closets for leftover items or issues. |
If You Find Problems During Your Walkthrough…
If something isn’t right during your final walkthrough—such as unfinished repairs or missing items—alert your real estate agent immediately. They can work with the seller’s side to resolve issues before closing. Sometimes money can be held in escrow until repairs are complete, or closing may be delayed until things are fixed.
Your Last Opportunity Before Closing Day
The final walkthrough gives you peace of mind that you’re getting exactly what you agreed to buy. Take your time, use your checklist, and don’t hesitate to ask questions if anything seems off. This extra attention helps ensure a smooth transition into your new home.

3. Reviewing and Signing Documents
On closing day, one of the most important steps is reviewing and signing a stack of documents that officially transfer ownership of the home. Both buyers and sellers will need to be present (or have given someone power of attorney) to sign these papers. Its completely normal to feel overwhelmed by the amount of paperwork, but understanding what you’re signing is crucial.
Common Closing Documents
| Document Name | Who Signs? | Purpose |
|---|---|---|
| Closing Disclosure | Buyer & Seller | Outlines all final terms, costs, and credits for both parties; must be reviewed before signing |
| Deed | Seller | Transfers property ownership from seller to buyer |
| Promissory Note | Buyer | Legal agreement to repay the mortgage loan |
| Mortgage or Deed of Trust | Buyer | Puts the home up as collateral for the loan in case of default |
| Bill of Sale | Seller & Buyer | Covers any personal property being transferred with the home (like appliances) |
| Affidavits & Declarations | Seller & Buyer | Sworn statements about property condition, occupancy, or legal matters as required by law or lender |
| Title Documents | Seller & Buyer | Prove clear ownership and list any liens or claims on the property; may include title insurance policies |
What to Watch For When Signing Papers
- Mistakes in Personal Information: Double-check names, addresses, and loan amounts for accuracy.
- Final Numbers: Compare closing costs and fees with your Closing Disclosure received earlier; ask about any unexpected charges.
- Payout Details: If you’re selling, confirm how funds will be paid out and when.
- Titles and Liens: Make sure the title shows no unresolved issues or outstanding debts attached to the property.
- Lender Conditions: Review any requirements or conditions set by your lender—these must be met for the sale to go through.
- No Blanks: Don’t sign documents that contain blank spaces or incomplete sections.
Your Right to Ask Questions
If anything is unclear, don’t hesitate to pause and ask questions. Real estate agents, attorneys, escrow officers, or title agents are there to explain every document before you sign. Taking time now can prevent headaches later on.
4. The Money: Payments, Closing Costs, and Fund Transfers
When it comes to closing day, handling the money is one of the most important parts of the process. Whether you’re a buyer or a seller, understanding how funds are managed ensures everything goes smoothly and prevents any last-minute surprises. Here’s what you need to know about payments, closing costs, and fund transfers on closing day.
How Are Funds Transferred on Closing Day?
On closing day, large amounts of money change hands to finalize the property sale. Typically, these transactions happen through secure wire transfers between banks. Personal checks are almost never accepted for large sums—certified or cashier’s checks may be required for smaller balances. Your closing agent (often a title company or real estate attorney) will give clear instructions for sending your funds safely.
Common Payment Methods
| Payment Type | Description | When Used |
|---|---|---|
| Wire Transfer | Direct electronic transfer between banks; fast and secure | Main method for down payment and final purchase funds |
| Certified/Cashier’s Check | Bank-issued check that guarantees the funds are available | Accepted for smaller balances at in-person closings |
| Personal Check | Your own check from a personal account | Rarely accepted; usually only for very small amounts (e.g., under $500) |
What Are Closing Costs?
Closing costs are additional fees paid at the end of the real estate transaction. Both buyers and sellers have their own sets of fees, which can vary depending on location and the details of the sale. Some common closing costs include:
- Lender Fees: Loan origination, application, or underwriting fees if you’re financing your purchase.
- Title Insurance: Protects against potential disputes over ownership.
- Escrow Fees: Payment to third parties managing documents and funds.
- Taxes & Recording Fees: State and local taxes, plus official recording of the property transfer.
- Homeowner’s Insurance: Sometimes paid upfront as part of closing.
- Real Estate Commissions: Paid by the seller, typically 5-6% of the sale price split between agents.
Sample Buyer’s Closing Cost Breakdown
| Item | Estimated Cost (%) | Description |
|---|---|---|
| Lender Fees | 0.5% – 1% | Covers loan processing costs |
| Title Insurance & Search | 0.5% | Covers potential title issues/disputes |
| Taxes/Recording Fees | Varies by state/county | Pays for government documentation/transfer tax |
| Total Estimated Closing Costs | 2% – 5% | Total as a percentage of home price (typical range) |
What Should You Prepare Before Closing?
- ID and Documentation: Bring valid photo identification (driver’s license or passport).
- Certain Funds: Know exactly how much to wire or bring as a certified check—your closing agent will send a “closing disclosure” with the final amount due.
- Lender’s Requirements: Confirm with your lender that all mortgage paperwork is complete and funds are ready to be released.
- Email Safety: Always verify wire instructions directly by phone with your agent or attorney to avoid wire fraud scams.
- Selling? If you’re selling your home, be sure your mortgage payoff information is correct so you get your proceeds without delay.
The Bottom Line: Stay Organized With Your Money on Closing Day!
The key to a stress-free closing day is making sure your money is organized and ready to go. Double-check payment methods, confirm all costs in advance, and follow up with your closing team about any questions you have about transferring funds. This way, you’ll walk away with keys in hand—and peace of mind!
5. Getting the Keys and Next Steps
When Do Buyers Get the Keys?
On closing day, one of the most exciting moments is finally getting the keys to your new home. But when exactly do you get them? In most cases, buyers receive the keys after all closing documents have been signed by both parties and the funds have been officially transferred. Sometimes this happens at the closing meeting, but it’s not unusual for the handover to occur later that same day or even the next business day if paperwork needs final processing.
| Step | Who’s Responsible | What Happens |
|---|---|---|
| Signing Closing Documents | Buyer & Seller | Both parties sign all required legal papers. |
| Funds Transfer | Lender/Buyer’s Bank | Money is wired to the seller or escrow account. |
| Recording of Deed | Closing Agent/Title Company | The sale is officially recorded with local authorities. |
| Key Handover | Sellers/Agent | Keys are given to the buyer once everything is finalized. |
Remaining Responsibilities After Closing
After you get the keys, there are a few remaining responsibilities for both buyers and sellers:
For Buyers:
- Utility Transfers: Set up or transfer electricity, water, gas, internet, and other essential services into your name.
- Home Insurance: Confirm that your homeowners insurance policy is active from day one.
- Move-In Arrangements: Schedule your move and any immediate cleaning or repairs you want done before settling in.
- Change Locks: For added security, many experts recommend changing locks after moving in.
For Sellers:
- Vacate Property: Make sure you’ve removed all personal belongings unless otherwise agreed upon in the contract.
- Leave Documentation: Provide manuals, warranties, or instructions for appliances or systems staying with the house.
- Final Meter Readings: Arrange for final readings on utilities if needed to avoid extra charges.
What Happens After Closing?
The closing process doesn’t end when you walk out of the title company office. Here’s what typically happens next:
- Your deed will be officially recorded by your local government office—this makes you the legal owner of your new home.
- If you bought with a mortgage, your lender will set up your loan account and send details about payment schedules and options.
- You’ll start receiving official mail at your new address, including property tax bills and homeowner association information if applicable.
- This is also a great time to introduce yourself to neighbors and start making your new house feel like home!